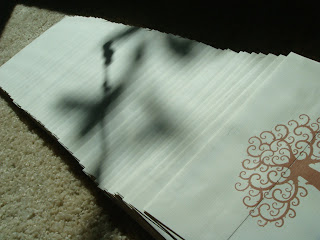
The first step was printing everything out. We got all of our paper at Paper and More. I ordered what I hope is all of the paper we need at once to save on shipping. I'll probably need to go back and order more once I figure out what our invitations are going to look like, but it shouldn't be too much. For this project, we used the cream card stock, copper card stock and navy card stock (that I can't find a link for).
I printed all of them out on our home printer &; then K got to cutting. We knew that we wanted to layer the two papers under the Save the Date, but we weren't sure about the layout. Did we want to center it, line up the bottom left corner? Do something crazy where one layer is centered & the other is off center? We played with that a bit (and of course I forgot to take pictures), and ended up with the one I showed you earlier. In case you've forgotten it's this:
Then, K got to cutting lots of paper & putting them together:
While I was fighting with our printer to get it to print on the envelopes correctly:
It took me forever to get it lined up. Then, it didn't like feeding multiple envelopes so I had to do them all by hand. Then, I noticed that for some reason it was randomly putting little lines on the return address instead of doing it all nice & pretty. Some of them were completely unreadable. Argh!
I will admit that I said a few choice words at the computer that night. I think K was glad he was in the other room with the paper instead of sitting next to me. lol
I finally got it clean enough. I figured that no one except me would notice if they were perfect, so I made sure they were all legible & went with it.
I'm not sure if I've mentioned this yet, but we're also going to have a reception in North Dakota the summer after we get married. Most of K's family lives in North Dakota, Montana & Minnestoa, including his parents, and we know that some of them may not be able to make it out to Seattle. I thought having a separate reception would mean they'd get to celebrate with us & take some pressure of some people who may have wanted to come but felt like they couldn't. So, I also made a small note that I slipped into all of the save the dates for K's family indicating that we'll have something in North Dakota & an invitation for that will follow separately. I forgot to take a picture of one before I closed the envelopes, but here's one of the less pretty ones:
Once everything was ready to go in the envelopes, K stuffed and sealed them one night while I was in St. Louis dress shopping (which is definitely another post). We also had a custom stamp made of our logo from Impress Rubber Stamps and we used brown ink to stamp that on the back of the envelopes. It's not exactly the brown we wanted, but we had trouble finding ink we liked in the right size, so again - I just went with it. I'm trying not to let my perfectionist tendencies make this wedding more complicated than it has to be. Anyway, so here's what one envelope looked like:
And here's the front, just for fun:
Here are all of them laid out on the floor. We sent about 85 Save the Dates out.
What do you think? Did everyone's get there OK?


3 comments:
Yes ! We got ours and it is own our bullentin board. Love it and you both.
I have mine in my cubical at the office. ;)
I thought they were great! I loved how ya'll put your own personal touch. So after all the printing, re-printing, stamping, and stuffing... Do you think ordering save-the-dates would have been worth it? Not as much fun though. :)
Post a Comment